20 Easy Bandana Hairstyle Tutorials (Step by Step Looks That Work)
WhatSheStyled
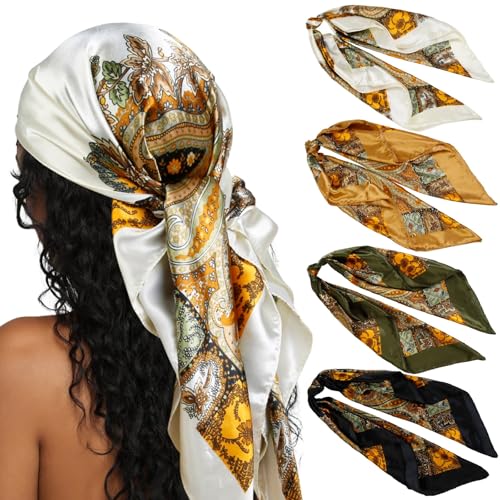
Woman with dark hair wearing a square bandana folded into a classic headband
Accessories · June 19, 2026

20 Bandana Hairstyle Tutorials Anyone Can Actually Pull Off

"There's no wrong way to tie a bandana. But these 20 ways are definitely the right ones."

Mia Tanaka

By

Mia Tanaka · Beauty Editor

Most bandana hairstyles look deceptively simple from the outside. You see the finished result — the perfect knot, the just-right drape, the fold that sits without slipping — and think "okay, but how?" This is that article.

We broke down 20 bandana hairstyle techniques into plain language. Not a step-by-step numbered list that reads like an IKEA manual — more like a friend who actually wears bandanas explaining it while you both stand in front of a mirror. Each look has the product that makes it work, because the bandana you use matters more than people realize. Satin slides. Cotton grips. Mesh breathes. The right material is half the technique.

None of these require a salon skill set. Some take under 30 seconds. The hardest thing is picking which one to start with.

Outfit #1

The Basic Headband Fold

Young woman with medium-length dark hair wearing a square bandana folded into a clean narrow headband

View this pin on Pinterest →

This is the one that started everything. Lay the square bandana flat, fold it diagonally into a triangle, then fold the point up to meet the long edge. Keep folding in the same direction — each fold narrows the strip by half — until you have a band about an inch wide. Slide it over your head, position it where you want it, and tuck both ends underneath at the back. That's it. No tying, no knotting, no struggle. The silk-like square bandana is perfect for this technique because the smooth texture slides into position easily and stays without needing a grip.

Outfit #2

The French Tuck (Behind-Ear Wrap)

Woman with straight brown hair wearing a floral bandana tucked behind both ears as a French wrap headband

View this pin on Pinterest →

The French Tuck is the move that separates a bandana headband from an intentional hair moment. Fold your bandana into a strip the same way as a basic headband, but instead of tucking the ends at the back, slide both ends behind your ears before securing them. The bandana now sits between your hair and your ears on both sides — the fabric frames your face differently and the sides of the band look cleaner. Works best on any hair length with hair that falls past the ears, because the hair covers the tuck point. The floral mesh bandana adds texture without bulk.

Outfit #3

The Classic Ponytail Wrap

Black woman with natural hair in a high ponytail wrapped with a colorful cotton bandana

View this pin on Pinterest →

Pull your hair into a ponytail first — secure it with a regular hair tie. Then fold your bandana into a strip, find the center of the strip, and press it against the hair tie from behind. Wrap both ends around the base of the ponytail once, cross them over each other, then continue wrapping upward for an inch or two if your bandana is long enough. Tie in a knot or bow at the back. The bandana covers the elastic entirely and gives the ponytail a foundation. Multi-purpose printed cotton bandanas work best here — they're grippy enough to stay wrapped and come in prints that look intentional against a ponytail.

Outfit #4

The Nape Knot (Triangle Tied Behind)

South Asian woman with long dark hair wearing a khaki triangle bandana knotted at the nape

View this pin on Pinterest →

Triangle bandanas were basically designed for this one. Open the bandana into its triangle shape and hold it by the two corner points of the long edge. Place the center of the long edge at your forehead (on or just above your hairline), then bring both ends toward the back of your head, pulling them under and around the triangle point that's hanging down. Tie the two ends in a double knot at the nape — the triangle point drapes down the back of your neck. The khaki and brown boho triangle bandana is ideal: the earthy colors work with everything and the triangle cut means zero folding required.

Outfit #5

The Crown Tie (Knotted at Top)

Latina woman with wavy hair wearing a silk satin bandana knotted high at the crown

View this pin on Pinterest →

The Crown Tie is a 90s throwback that reads as completely current when you do it right. Fold your bandana into a strip, place it around your head with the two ends meeting at the very top — not the sides, not the nape, the crown. Tie the ends in a double knot so the knot sits high on top of your head, then adjust the band so it's even. The satin bandana earns its place here because the sheen of the knot at the crown is the visual payoff. This one works better on a half-up style or loose hair, so the tied ends don't look like they have nowhere to go.

Outfit #6

The Side Bow (Tied Asymmetrically)

East Asian woman with sleek straight hair wearing a floral satin bandana tied in a soft side bow above one ear

View this pin on Pinterest →

The trick here is committing to the asymmetry rather than accidentally landing there. Fold your bandana into a medium-width strip (wider than a headband, narrower than a full wrap). Place the center of the strip at the back of your head, bring both ends forward, and cross them at the side — right above one ear. Tie into a bow and let both loops and tails be intentionally full rather than pulling them tight. The bow should be relaxed, not stiff. A satin-feel floral bandana does this beautifully because the satin holds its shape in the bow without collapsing.

Outfit #7

The Do-Rag Drape

Black woman with short natural hair wearing a multicolored cotton bandana draped do-rag style

View this pin on Pinterest →

Place the bandana over the top of your head with the center point facing backward. Bring the front edge down to sit at your desired forehead position — usually about an inch above the hairline. Fold the very front edge up once to create a clean, straight line across the forehead. Take the two side ends and pull them toward the back, crossing them over the center triangle point, then bring them forward slightly before tying them in a knot or double knot at the nape. The tails hang. A 22x22" cotton bandana is the right size for this — you need enough fabric to wrap around the full head and still have tails to knot.

Outfit #8

The Full Turban Wrap

Woman with deep brown skin and locs wearing a large 35-inch satin bandana wrapped as a full turban

View this pin on Pinterest →

You need a large bandana for this — at least 35 inches. Start by placing the bandana flat across your head with equal fabric on each side. Twist both ends once, then bring them around to the front and cross them over each other above the forehead, pulling the fabric snug against the head. Take both ends back around to the back and tuck them under the wrapped layers at the nape. The key to a turban that actually stays is the tension in that initial crossing step — too loose and the whole thing slides. A large satin bandana is the right call here: the weight helps the wrap sit and the finish looks intentional.

Outfit #9

The Twisted Headband

Mixed-race woman with curly hair wearing a twisted satin bandana headband with the twist sitting at the top

View this pin on Pinterest →

Fold your bandana into a strip. Before placing it on your head, hold both ends and twist the entire strip once — so the fabric makes a half turn in the middle. Place the twist at the center of your forehead or slightly off-center, and bring both ends around to the back, tying them in a knot or tucking them under. The twist is the detail that elevates this from basic headband to actual technique. A viscose-cotton blend bandana holds the twist shape better than pure satin because it has enough texture to grip itself.

Outfit #10

The Half-Up Bandana Knot

White woman with long wavy hair in a half-up style with a floral cotton bandana tied as a knot at the top section

View this pin on Pinterest →

Take the top half of your hair and gather it as if you were making a half-up ponytail. Instead of a hair tie, loop the center of your bandana around the gathered section and tie the two ends together in a double knot — the knot becomes the focal point at the back of the half-up. Leave the tails to hang naturally. The front sections fall on both sides of your face as usual. This technique works best with a bandana that has some weight to it — a thick floral cotton gives the knot body instead of collapsing flat.

Outfit #11

The Braid Weave (Woven Through a Braid)

Black woman with dark skin and long box braids with a navy blue floral bandana woven through one braid

View this pin on Pinterest →

Fold your bandana into a very narrow strip — thinner than a headband, more like a ribbon. Take your braid and start at the top near the root. Thread the center of the strip under the first section of the braid, then bring both ends of the strip forward and cross them over the braid's outside section, threading them under the middle strand. Keep crossing and threading with each new section of the braid as you work downward. Tie off at the end. This works on three-strand braids, box braids, or chunky braids. A square floral cotton bandana in navy blue gives the woven texture something to contrast against.

Outfit #12

The Bun Anchor (Tied Around a Bun)

Latina woman with olive skin and a messy bun with a satin bandana tied around the bun as an anchor

View this pin on Pinterest →

Put your hair in a bun first — messy or neat, doesn't matter. Fold your bandana into a strip wide enough to wrap around the base of the bun without looking skimpy (about 2-3 inches). Press the center of the strip against the back of the bun base and wrap both ends around, crossing them at the front of the bun. Bring the ends back around and tie a knot or bow at the back. The bandana acts as the bun's anchor — it adds structure to a messy bun and color to a slicked bun. A satin bandana wraps smoothly without adding bulk.

Outfit #13

The Skinny Scarf Wrap

Woman with medium brown skin and long straight hair with a long skinny scarf wrapped through and around a low ponytail

View this pin on Pinterest →

A 58" skinny scarf gives you completely different options than a square bandana. The length lets you weave, wrap, and layer without the bulk. For the classic Skinny Scarf Wrap: take the center of the scarf and press it at the back of your head at the nape. Bring both ends forward along the sides of your head, cross them at the forehead, then bring them back to the nape and tie in a knot with tails hanging. You can also thread it through a ponytail base, wrap it around a bun, or cross it at the crown. The silk feeling of this scarf means it glides into position — no dragging, no friction.

Outfit #14

The Double Knot Nape

Young woman with warm brown skin and a wavy bob with a green satin bandana tied in a double knot at the nape

View this pin on Pinterest →

The difference between a single knot and a double knot at the nape is bigger than it sounds. A single knot lies flat. A double knot becomes a sculptural detail — it adds height, texture, and visual weight at the back of the head. Fold your bandana into a strip, tie it around the head with the knot landing at the nape, then tie a second knot right on top of the first. Pull both knots snug. The result looks intentional rather than like you just tied it and forgot about it. A large satin square in a bold color like green makes the double knot pop visually against the back of the neck.

Outfit #15

The Over-Ear Accent

East Asian woman with a sleek low bun and a satin bandana worn over the ears as an accent headband

View this pin on Pinterest →

Most headbands sit above the ears. The Over-Ear Accent sits below them — or right over them — creating a completely different frame for the face. Fold your bandana into a medium-width strip (about 2-3 inches), and position it across the widest part of your head, pulling it down so the fabric covers the upper half of each ear. Tie or tuck at the nape. This works especially well with a sleek bun or slicked-back style because the covered-ear look requires the surrounding hair to be smooth. A silky satin lightweight bandana works best here since it stays in position without pressing uncomfortably on your ears.

Outfit #16

The High Ponytail Tie

Black woman with natural 4C hair in a high puff ponytail with a satin silk-like bandana tied at the base

View this pin on Pinterest →

The High Ponytail Tie is different from the Classic Ponytail Wrap — here, the bandana doesn't wrap the ponytail itself, it wraps the base. Pull your hair into a high ponytail. Fold your bandana into a long strip and tie it tightly around the very base of the ponytail — right where the hair tie is — finishing in a neat bow or knot at the front. The hair fans out above the knot naturally. On a high puff or high ponytail with volume, this technique defines the base and makes the shape of the ponytail feel more intentional. A silk-feel large bandana has enough length to wrap a thick ponytail base multiple times if needed.

Outfit #17

The Low Sleek Wrap

Woman with olive skin and long dark hair slicked back low with a printed satin bandana wrapped around the perimeter

View this pin on Pinterest →

Slick your hair back as low and smooth as you can — gel or pomade helps. Then take a narrow-folded bandana and wrap it around the perimeter of your head like a sweatband, sitting right at the hairline. Bring both ends to the nape and tie, making sure the band sits flush against your hair across your forehead, temples, and the sides. The bandana isn't just an accessory here — it's actively holding the sleek style in place while it dries or sets. A satin bandana does double duty: it keeps the wrap smooth and doesn't disturb the slicked hair underneath.

Outfit #18

The Top Knot Finish

Woman with medium-brown skin and hair in a high top knot bun with a silk bandana tied around the bun in a finishing knot

View this pin on Pinterest →

Different from the Bun Anchor. With the Top Knot Finish, you fold your bandana into a strip, wrap it once around the base of a top knot, then bring both ends up and over the top of the bun itself and tie them in a bow or knot right at the very peak. The tails of the knot cascade down from the top of the bun. The bandana becomes the highest point of the hairstyle rather than an afterthought at the base. A silk-like satin bandana with a subtle print is ideal — the pattern reads better at a distance than a solid color when the knot is that elevated.

Outfit #19

The Ear-Tuck Headband

South Asian woman with warm skin tone and shoulder-length wavy hair wearing a boho floral bandana headband tucked behind the ears

View this pin on Pinterest →

Similar to the French Tuck but simpler — and the detail that makes it land. Fold your bandana into a headband strip and slide it onto your head normally. Then take each end of the strip and push it behind the ear on that side, tucking the fabric under rather than over the ear. The strip now disappears behind your ears instead of sitting on top of them, which gives the headband a completely different profile from the front. It looks less placed and more part of the hairstyle. Works best with wavy or textured hair that falls past the ears and can hide the tuck point. A boho floral bandana in a triangle headband style is ideal since the pre-formed shape stays behind the ear without shifting.

Outfit #20

The Lace Overlay on Half-Up

Woman with fair skin and long hair in a half-up style with a sheer lace flower embroidery bandana layered over the top section

View this pin on Pinterest →

This is the technique for when you want people to look twice and then ask where you got your bandana. Do your half-up first — any version works, but a loose, romantic half-up is the best canvas. Then take your lace or sheer bandana and fold it into a gentle headband strip, wide enough to show the lace embroidery clearly (about 3-4 inches). Position it over the top section of the half-up, right at the crown. The sheer lace sits over the hair rather than replacing any of it, which creates a layered, textured look — hair visible through the lace, embroidered flowers floating above. Secure by tucking the ends beneath the half-up section or tying them loosely at the back. The effect is editorial. The technique is straightforward.

Every technique here works in real life, not just in photo shoots. The ones that feel complicated usually aren't — they just need one practice run. Try the Basic Headband Fold first if you're new, then work your way toward the Twisted Headband or Full Turban once you have the feel for how your bandana handles. Save the ones that catch your eye and shop the exact bandana before you try it — material makes a bigger difference than most people expect.